I see Detroit's point on sequestering liquid refrigerant, but that can get pretty complicated. I don't like solenoid valves in refrigeration if I can avoid it.
Lessons from the SAAB. I had a little over 6 gallons of chiller liquid in a tank, concealed in an ice chest in the back. A decent pump and insulated lines. Since the car had a TXV on the in dash evaporator, a second TXV in the rear at the chiller worked well. I had to increase the size of my R/D - I used one from a 1970's GM land yacht. Biggest one I could find prowling the boneyard for examples. 25f is pretty cold, and I was able to adjust a block style valve to get there easily. I did not want too big of a differential from the main system. Oil return was one reason.
I found that by simply reducing the fan speed on the front evaporator the chiller received more refrigerant. TXV's are good at that. Neither part of the system was ever truly shut down. Again, oil return.
In your case I would convert the front evaporator to a TXV system. I have done this to more than one CCOT system. Not difficult. Lose the solenoid valve. Keep the Accumulator. ADD a second Accumulator to the suction line circuit from the chiller. Feed both TXV valves from the same R/D.
Some newer TXV valves seal a little too well for these kinds of tricks. You want one passing a little bit of refrigerant all the time through the chiller, to keep things moving toward the compressor.
The second accumulator on the rear circuit should help with the slugging.
2012 GMC Yukon AC + chiller mess
Moderators: bohica2xo, JohnHere, Tim
-
bohica2xo

- Preferred Member
- Posts: 1170
- Read the full article
- Joined: Wed May 11, 2016 4:12 pm
- Location: Las Vegas, NV
Re: 2012 GMC Yukon AC + chiller mess
awesome info guys, appreciate it.
I will look into what i can do the re-work some of the equipment.
short term:
i should be able to relocate the RD to after the condenser, before splitting to feed both circuits.
I can grab another accumulator to put after the chiller brick (and also to verify the direction of the one i have already put in)
i think i would have to pull the evaporator out of the dash to convert it to a TXV, GM has one of their wonderful blocks on the end of it- would sizing down that orifice tube to reduce the amount of liquid that gets caught in that circuits accumulator help? i believe it does have a white OT in it. i have a GM "variable" one here also i could throw in and try.
the intercooler pump is controlled by PWM so i can reduce the flow way down, and obviously the cabin blower i can slow way down. should i slow them both way down prior to shutting the truck off, say 5minutes before i arrive wherever to allow the RD and accumulator to trap liquids?
this chiller uses a plate style liquid to liquid heat exchanger, dimensions are like 19x3x5 iirc
the priority is the chiller to me, so if the cabin ac isnt perfect its not so much a big deal. its mostly just a weekend/carshow/drag race toy anyone dumb enough to ride around with me in it isnt expecting ac anyway
Re: 2012 GMC Yukon AC + chiller mess
Relocating the RD won't do anything, it's just storage, as long as it's on the liquid line before any solenoids or TXVs it's location doesn't matter.
Converting the cabin evaporator to a TXV might cause other problems, and it's not going to help your primary problem of startup flooding. Dual TXVs need to be tuned and slowed down so they don't induce each other to hunt and oscillate. Front OT and rear TXV is much easier and more stable. Dual TXVs is just fine if you want to do it, just a risk that it might be a headache and it's not going to do anything about this startup problem.
An orifice tube system MUST have some liquid existing in it's downstream accumulator in order to regulate, you are going to have to add charge until the accumulator is partly full of liquid no matter what OT size you put in.
How you shut the truck off does not matter unless you can isolate the charge on the high side with check valves and solenoid valves. If you are not going to do that, you cannot control where the charge goes, it's going to fill up everything cold within a minute or 2.
I think probably the best quick and easy fix to try is add a big accumulator in the chiller suction line. Actually if you built a custom openable accumlator stuffed with 1 of a standard size L men's white gym sock, I'm almost certain it would cure this flooding at startup. Even if you move all the liquid out of the chiller and into the accumulator it can still quickly flash.
Actually, if you could just startup the system gradually you might not need any of this. Start the engine, idle and engage the clutch for only 5 seconds, do that maybe 5 or 10 times, and then let it idle. I would think the liquid will get to the right places, and you'll be ready to chill water. You also need to get the charge amount correct, if it's overcharged it's going to be tough to deal with.
Re: 2012 GMC Yukon AC + chiller mess
I have never had TXV's "hunt" on decoupled systems. For years I have heard that a V5 / V7 compressor and a TXV will "hunt" as well, but I have never had it happen. Just my experience.
Converting the OT to TXV is usually done right at the firewall. Clamp the thermocouple to the suction line leaving the firewall for the Accumulator.
Detroit, we both agree that he needs a second accumulator, and more storage. I found that basically doubling the R/D volume made the SAAB settle down. Given the longer line lengths I was dealing with and the top of the engine compressor mount, liquid at the suction was never a problem.
I don't know about a gym sock, but perhaps a generous commercial suction line filter in the main suction line before the compressor inlet would do it.
Re: 2012 GMC Yukon AC + chiller mess
thanks guys,
i will start with the easiest , adding another accumulator to the chiller circuit and easing into the compressor cycle for the first couple minutes.
the additional accumulator, might be a dumb question, when youre talking about liquid settling, the compressor is probably the lowest component and chiller is just about the same height. it would be pretty easy to mount it at the same height as everything else right out of the heat exchanger or i can mount it "up high" top of the radiator support or so.
refrigerant charge was going to be question v2.0 lol
i've tried to read up about the proper way to charge monitoring pressures and superheat/subcool.... but in auto ac thats more of trying to hit a moving target.
my largest constraint is shedding the heat off of the condenser with the hood closed, at idle. it gets upset when high side pressure starts getting into the 270psi+. engine coolant temps start to slowly rise, it has a 55gpm electric water pump, dual fans, there are some parameters in the tune related to ac compressor on to allow it to reach/maintain psi. if I add another portable fan (or hit condenser with some mist from the water hose) pressure drops. so i know a pusher fan in the front should help and condenser is pretty cheap so im going to replace it to rule out problems with it.
so i guess my question is even though its capable of sub freezing chiller water temps, should i charge it to the point that it can no longer keep up with the added heat load, given its still dropping water temp? i mean ive tried it before, but i think with the accumulator and aux fan i may be able to avoid problems with the compressor psi going nuts after sitting a while
Re: 2012 GMC Yukon AC + chiller mess
I don't think the height of the accumulator relative to the compressor or chiller makes any difference. If i were plumbing it, I'd be keeping suction lines simple, short, try to avoid bends, for sure avoid sharp right angle fittings.
Another thing I thought I should clear up: The tee of these two suction lines must be after the cabin AC unit's accumulator, you need that accumulator to still function like normal, storing excess liquid refrigerant. If you don't have it, the OT for the cabin unit will not function properly. For each unit (cabin evap, chiller) their suction flows need to go through only 1 accumulator each, tee together, then onward to the compressor suction port.
Charging an OT/TXV system is the same as charging an OT only system, it's all about getting the liquid amount in the accumulator correct. The subcool isn't something that can be controlled, you hardware you have will determine the subcooling. I think I wrote up a procedure a long time ago on this board for a TXV system, can't remember if I did such a thing for OT only system.
Re: 2012 GMC Yukon AC + chiller mess
Yep, i'm followin...the two suction lines are already Tee'd right at the compressor so im good there
The RD is currently only on the chiller circuit, liquid line comes out of the condenser hits the tee and splits to each.
chiller has the RD then to TXV
cabin has solenoid then to OT, evap, accumulator
may have been why bohica mentioned moving it ahead of the tee so both circuits could "draw" from it?
Re: 2012 GMC Yukon AC + chiller mess
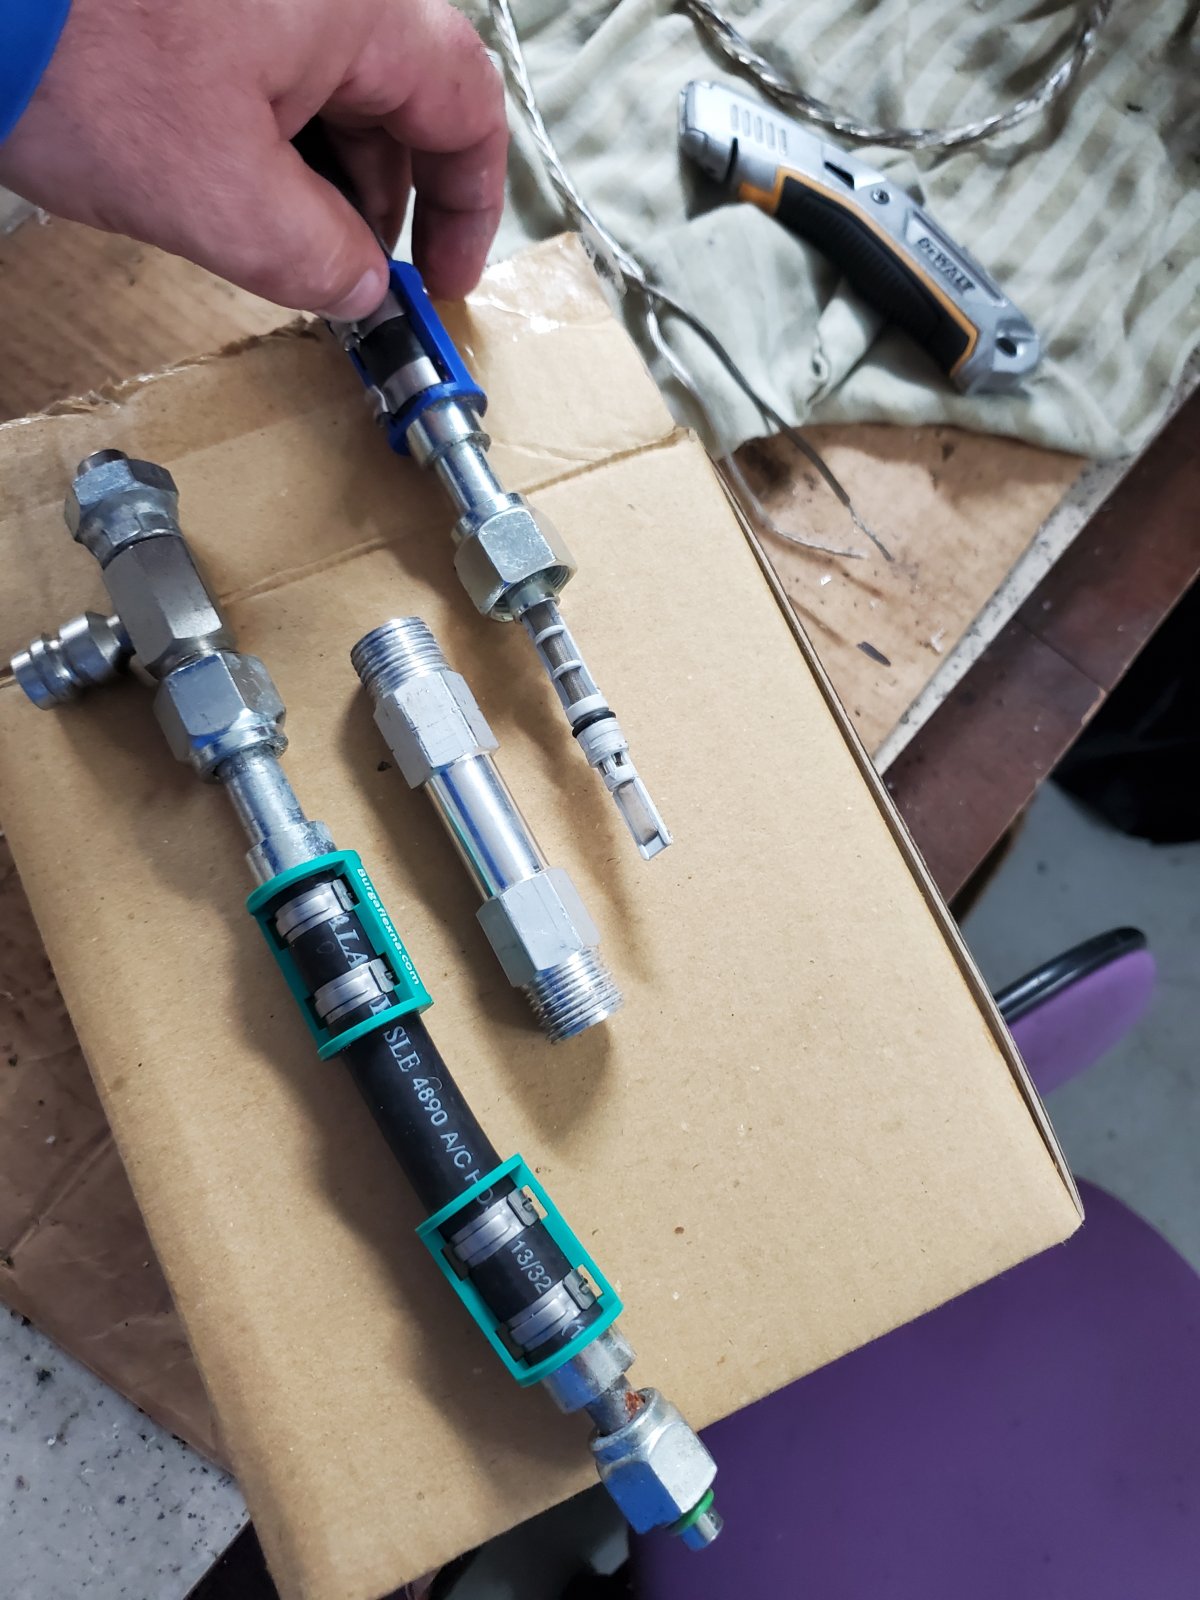
think i found a problem....
universal orifice tube housing, came assembled, with an arrow on it...prob my own fault for not checking it.
but it was backwards, blew the OT into the hose.
replaced the condenser, verified the accumulator in/out i already had was correct, i need a few fittings to install another accumulator but going to see how it does with the OT fixed, and also installed a pusher fan in front of everything
i threw it all back together, i replaced a hose i had coming out of the RD to the chiller with a hard line - it was basically making a pretty tight 180* i had concerns it was collapsing.
i pulled a vacuum on it for about an hour i'll let it sit and check tomorrow then charge.
-
tbirdtbird
- Preferred Member
- Posts: 1244
- Joined: Sat May 02, 2020 1:48 pm
- Location: Texas
Re: 2012 GMC Yukon AC + chiller mess
Is that universal orifice tube housing from Bergclip?
When considering your next auto A/C purchase, please consider the site that supports you: www.ACKits.com
Re: 2012 GMC Yukon AC + chiller mess
coldhose iirc
Not sure if outside links allowed? (No. See Number 8 in Forum Rules.)
(Link deleted.)
Says for #6 hose, but the threads on the body are #8 insert oring
Not sure if outside links allowed? (No. See Number 8 in Forum Rules.)
(Link deleted.)
Says for #6 hose, but the threads on the body are #8 insert oring
Last edited by JohnHere on Sat Jul 22, 2023 9:25 am, edited 1 time in total.
Reason: Links to outside businesses not allowed.
Reason: Links to outside businesses not allowed.